

If you are expanding your team and want to be able to spread the social media workload, you may want to think about giving your employee(s) access to a company’s Facebook business account, whether that is your own, or even for a client.
Sometimes the way to do it isn’t always so clear, and so if you want to make another Facebook user an admin of an account, then these are the steps to do so.
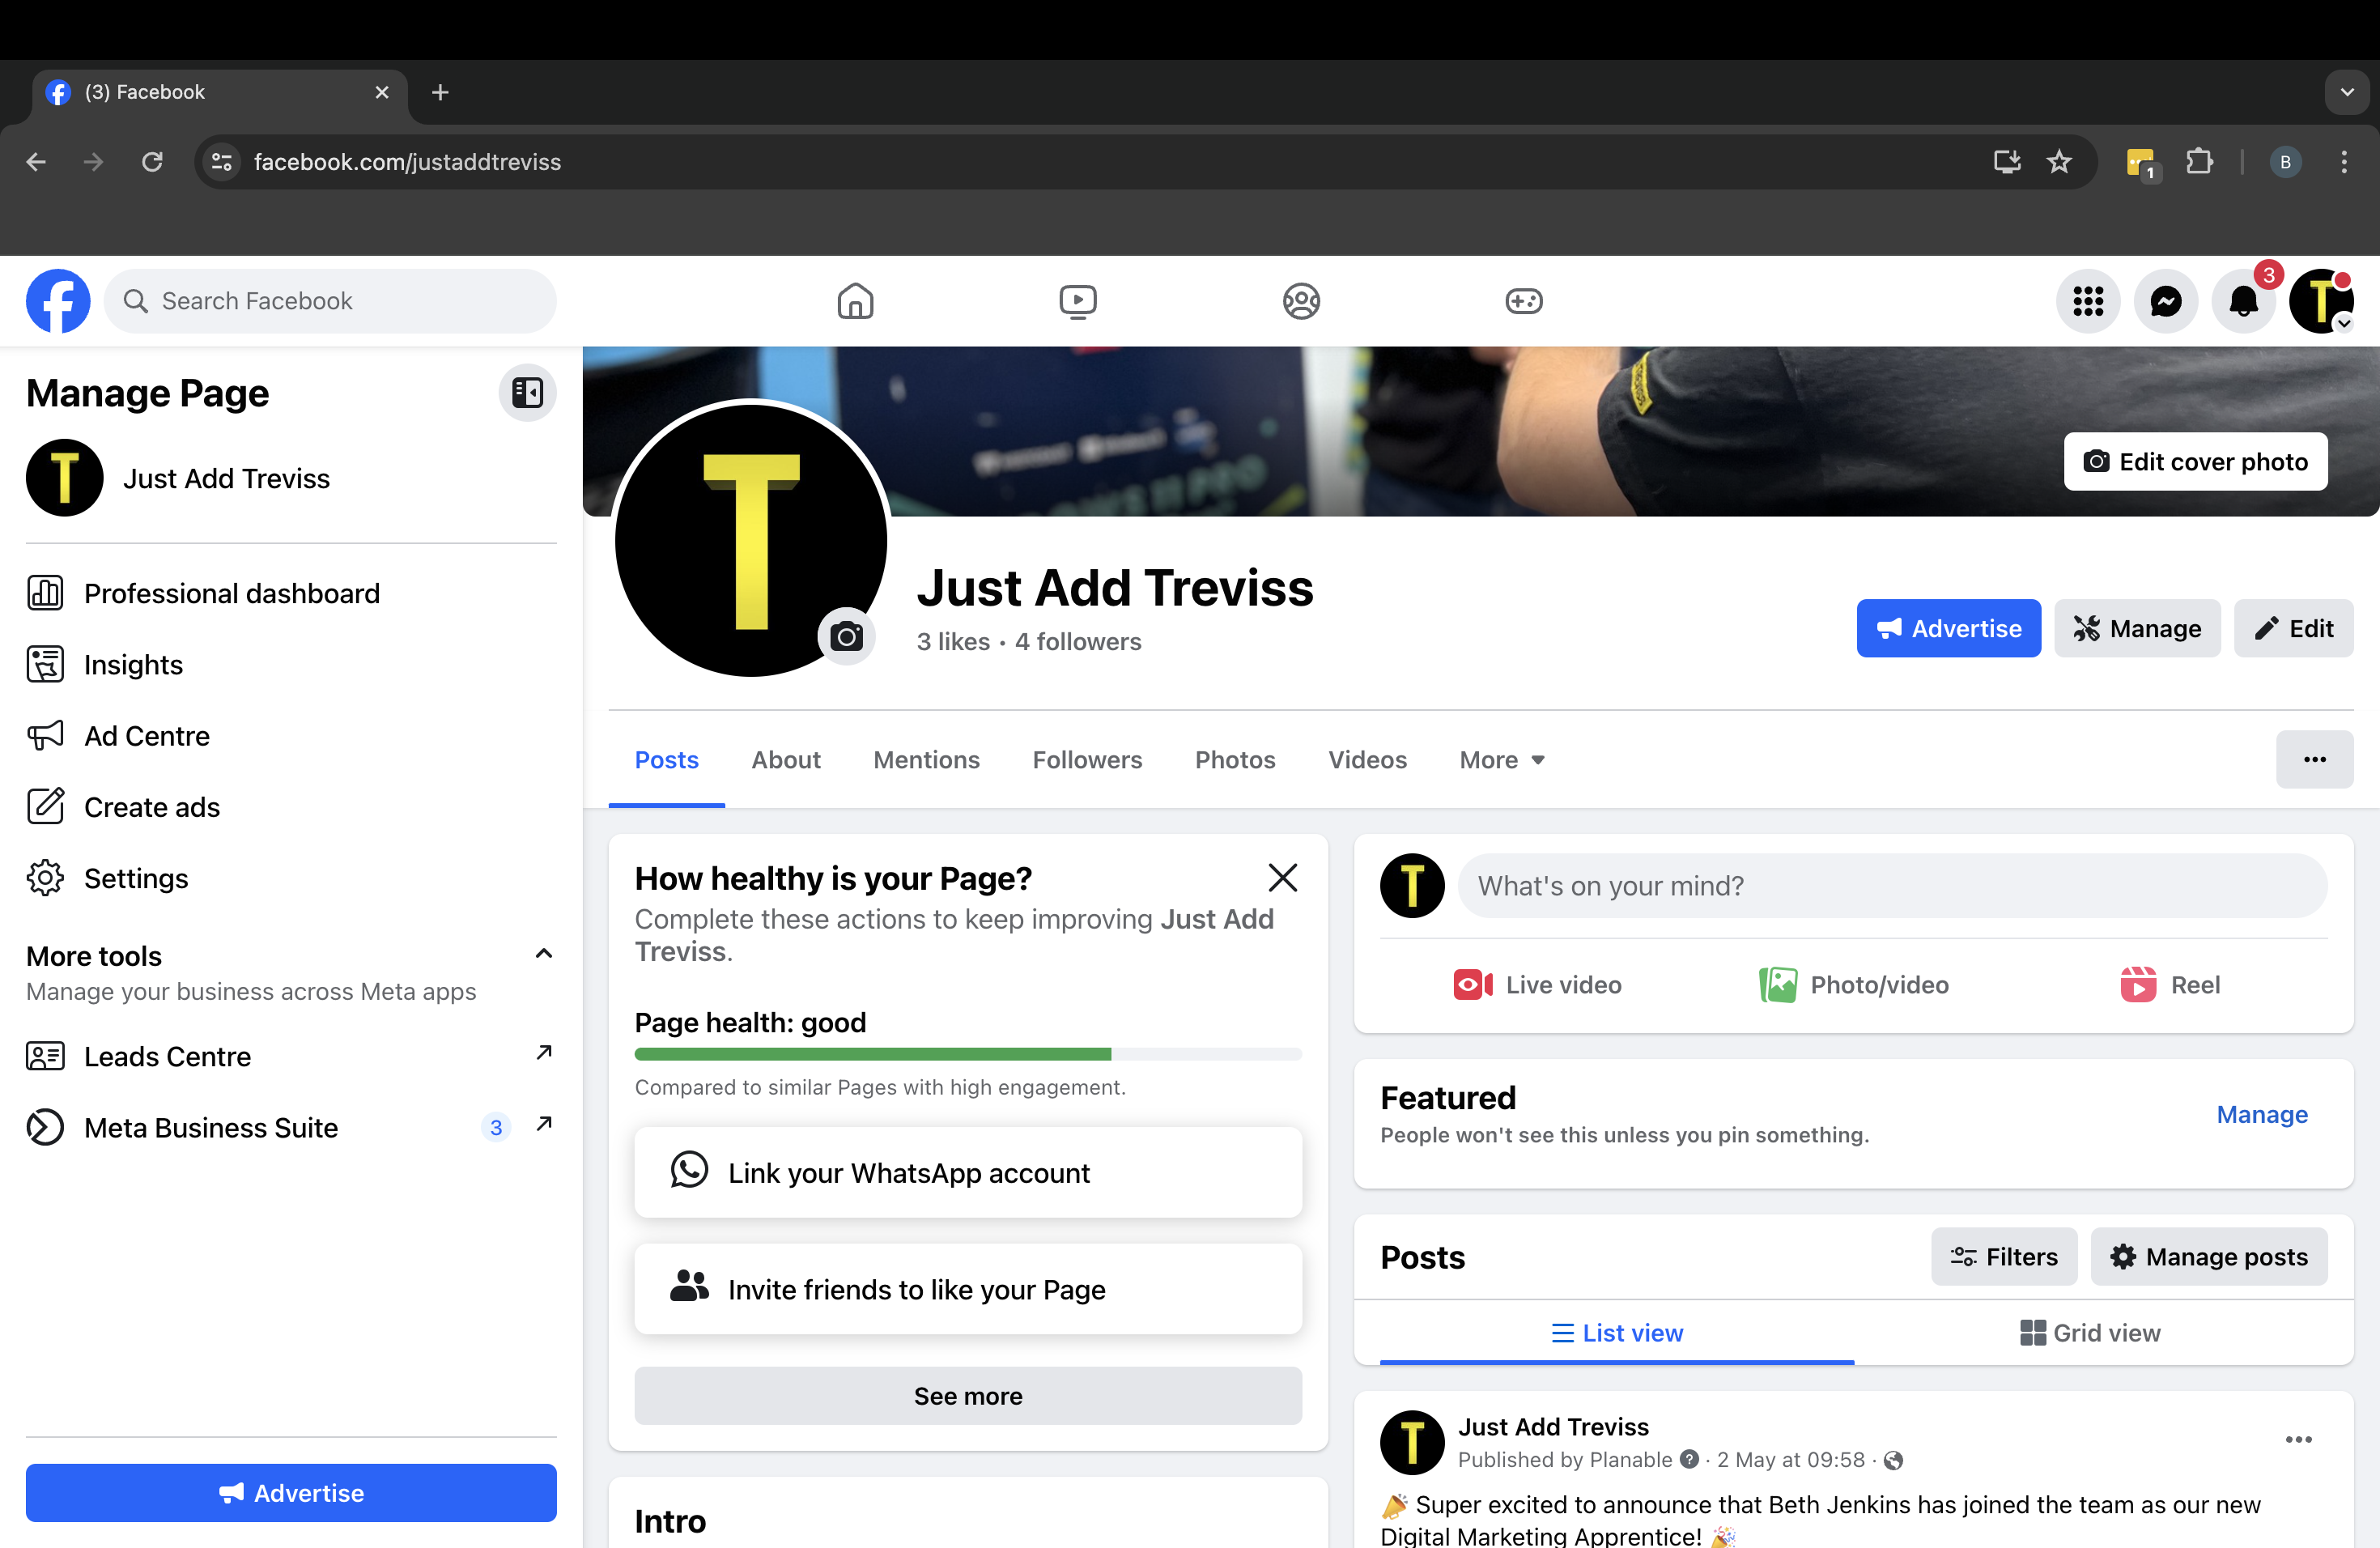
1. First, load up the main home page of your Facebook account
You should see a menu bar down the left-hand side of your screen.
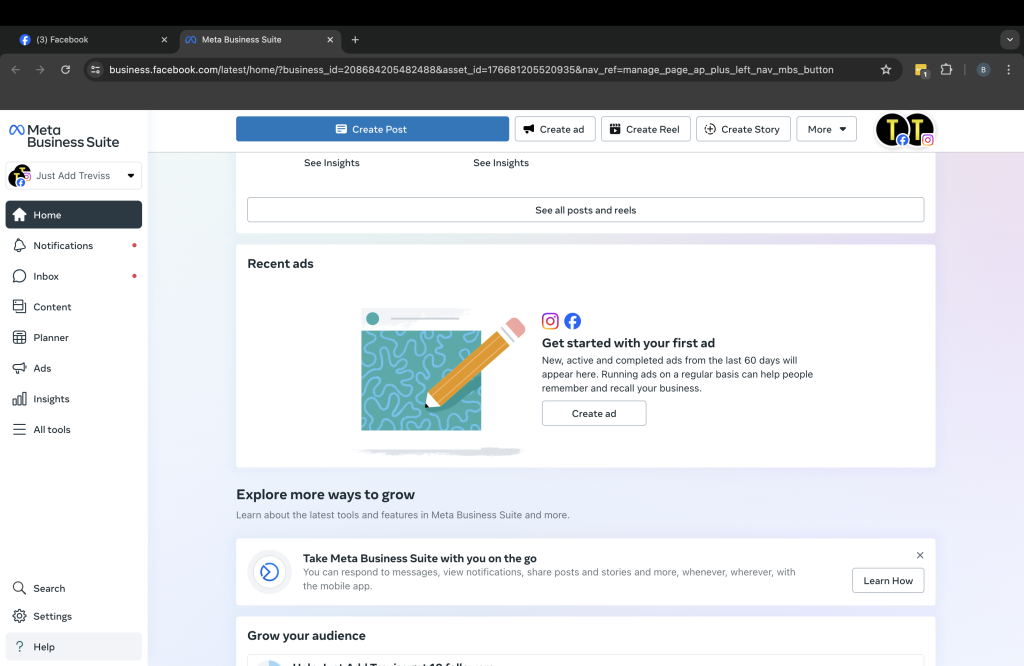
2. Click on ‘Meta Business Suite’
This is the space where you can manage all of your marketing and advertising activities on Facebook and Instagram.
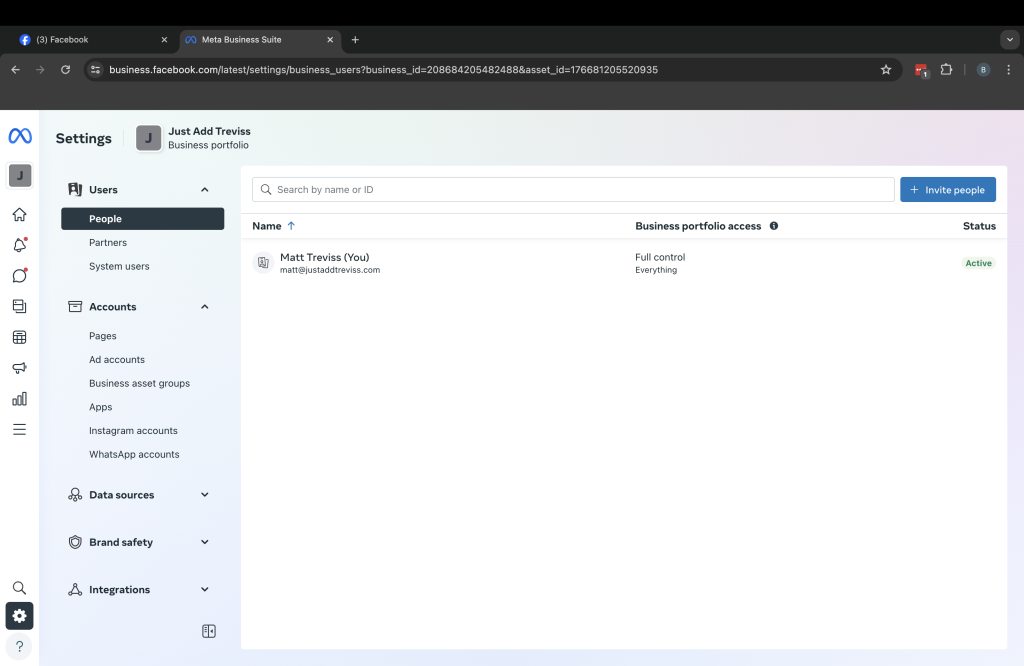
3. Click on ‘settings’ in the bottom left-hand corner
4. Click the blue ‘Invite people’ near the top right corner of the page
This will bring you to the page that is titled ‘People’, which is underneath the subheading of ‘Users’. On this page, click the blue ‘Invite people’ near the top right corner of the page.
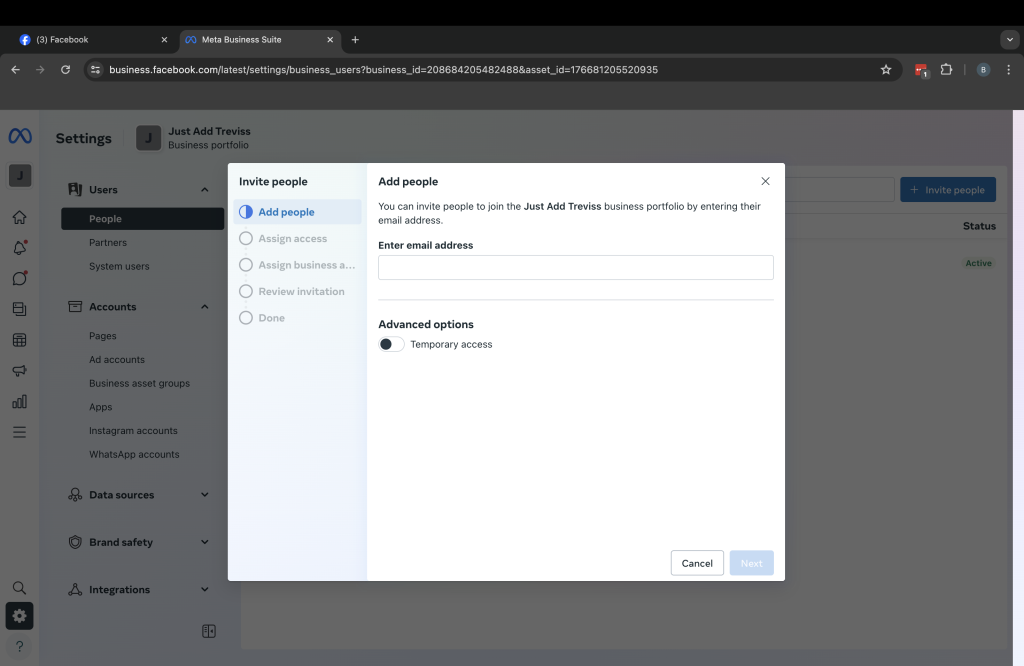
5. Enter the email address of the other user
After this, the process should be fairly straight-forward. You just need to type in the email address of the person who you would like to add to manage the account in the box underneath ‘Enter email address’. You can also make a person’s access temporary if it’s only for a short period of time. To do this, you just need to click ‘Temporary access’.
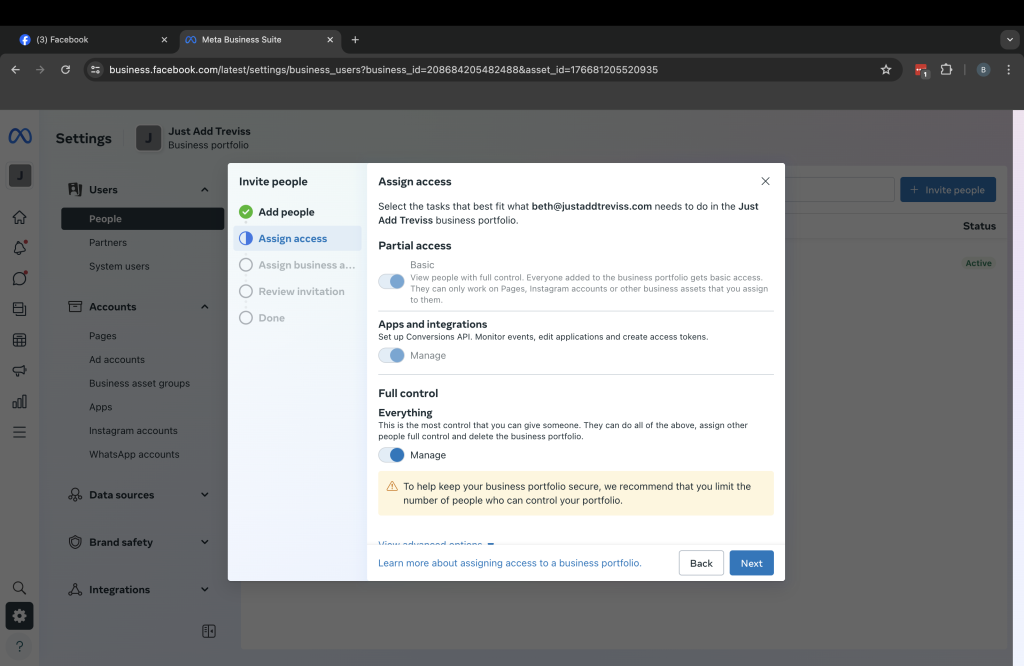
6. Choose the level of access
Now, you need to decide what level of access you would like to give them. You have three levels of access, in which you can choose:
The basic level will only allow them to work on specific business assets that you can assign to them.
The level up from that allows for a person to set up Conversions API, monitor events, edit applications and create access tokens.
The last level of access is the highest level, and this is where you can give a person full range to do everything previously mentioned, as well as assigning access to others, and they may even be able to delete the business portfolio if they wish to do so.
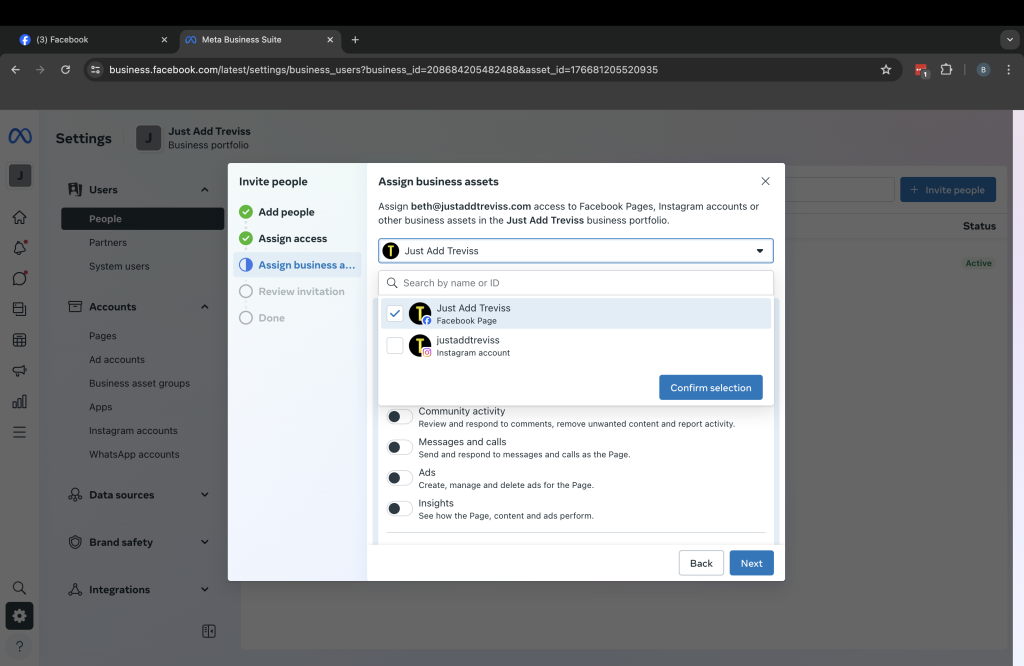
7. Choose which account(s) you want to apply the access to
Once you have decided on the level of access, if your Facebook and Instagram accounts are linked, it may ask you to choose which platform/s you would like to give the access for. You can choose one or all of them if you wish.
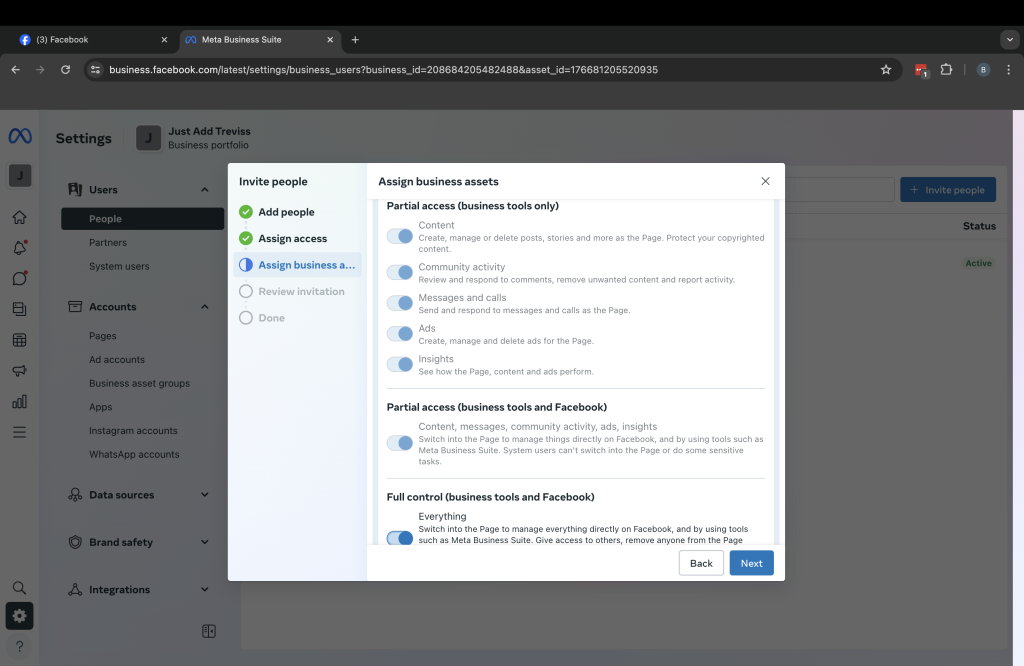
8. Choose the level of access on each of the platforms
Once again, you may now choose what level of access for each of the platforms. It may be that you wish to allow full access on one platform (e.g. Facebook), but may only want to give partial access on the other (e.g. Instagram). Once you have decided, click ‘Next’.
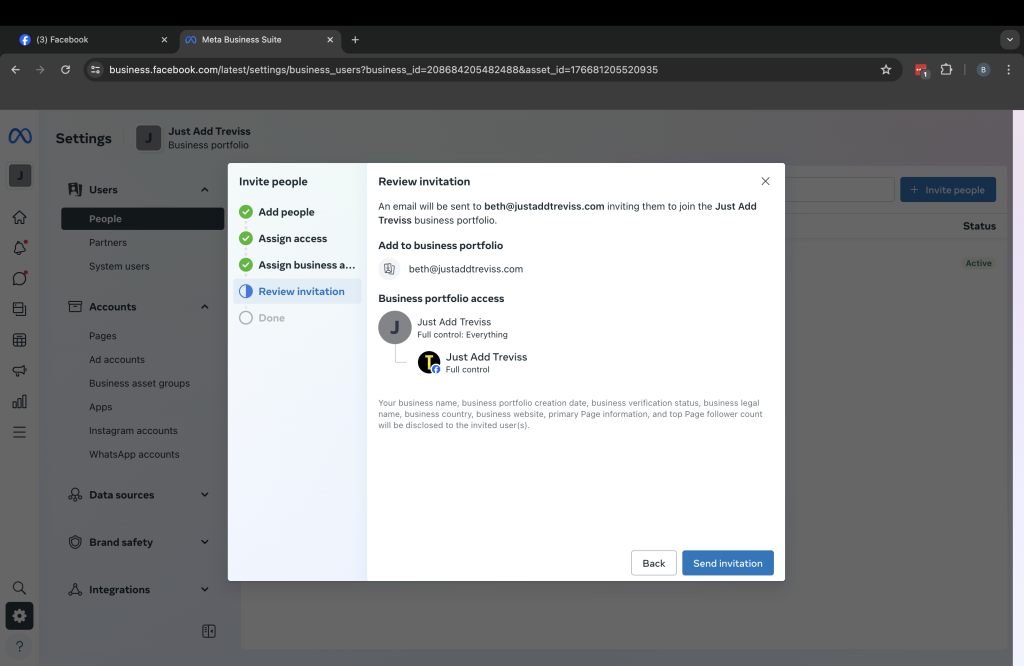
9. Review the invitation
You may now review your invitation. This will be your chance to check that you have given the right access level on the correct platform(s) and to the correct person/email address. After you have reviewed, it is now time to send the invitation. Click ‘Send invitation’.
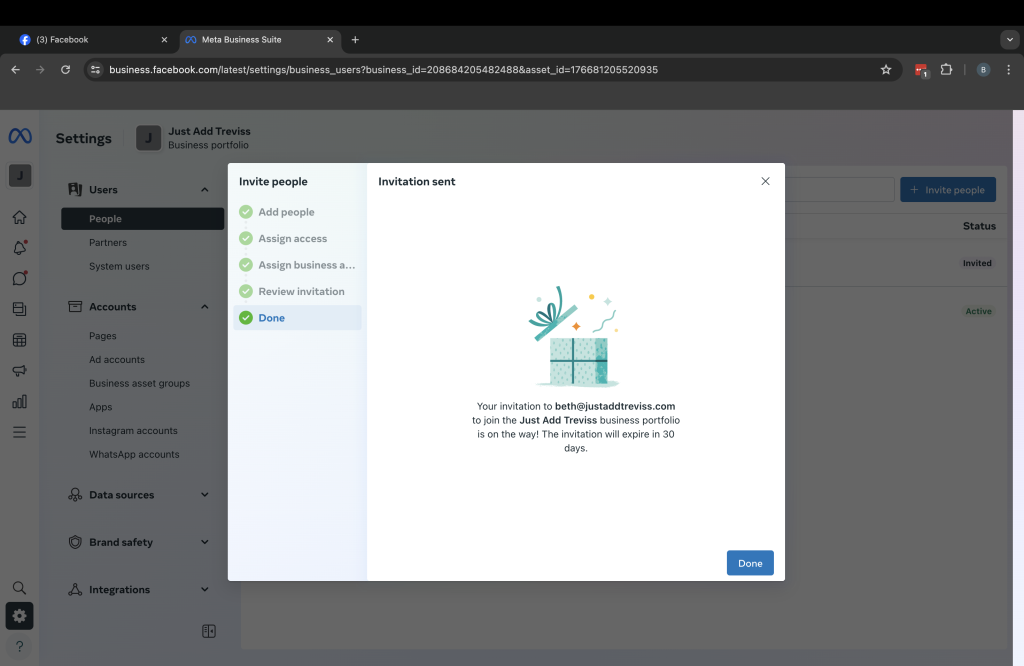
10. Click ‘Done’
You will now be told that the invitation has been sent. The recipient must now check their inbox and accept the invitation before 30 days, so that they can successfully access the chosen platform(s). All you have to do now is click ‘Done’.
11. How to remove a user
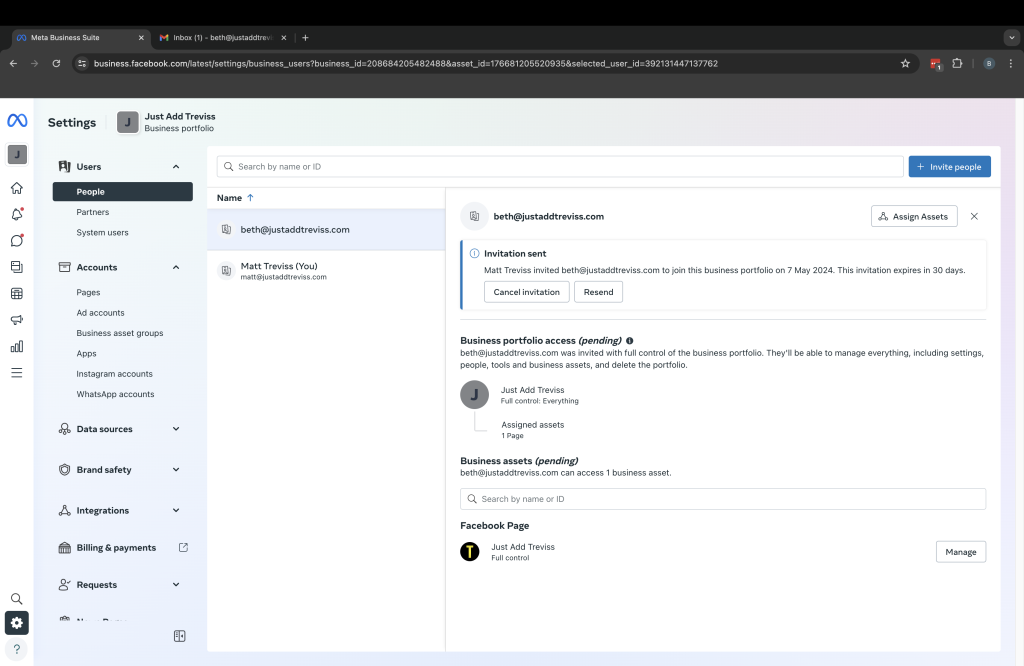
If you change your mind or have noticed there has been a mistake, you can also cancel the invitation if you wish to do so by clicking on the ‘Cancel invitation’ box.
To find this box, you can click on the person that you want to unsend the invitation to, which will then show you the details of their level of access, and whether or not they have accepted the invitation.
On this screen, click ‘See more’ under ‘Invitation sent’, and then you should see the options ‘Cancel invitation’ and ‘Resend’.
That’s it! Hopefully, you have successfully added another user to Facebook. Of course, if there are any issues, or if you have any questions, please feel free to get in contact and we will be more than happy to help. Our email is studio@justaddtreviss.com.